Option 1: The easiest and quickest way to upload a video is done through Microsoft OneDrive (https://algonquinlivecom-my.sharepoint.com/).
- When in OneDrive, nagivate to the My Files area

- Create or navigate into a folder of your choice
- Click on the Add New button

- Choose Files Upload and locate the video on your computer
Option 2: If you wish to upload from Microsoft Stream (https://www.microsoft365.com/launch/stream?auth=2), use the Upload button in the top menu to upload your video
(Note: it may take some time for the video to show up in the list, depending on how large the file is)
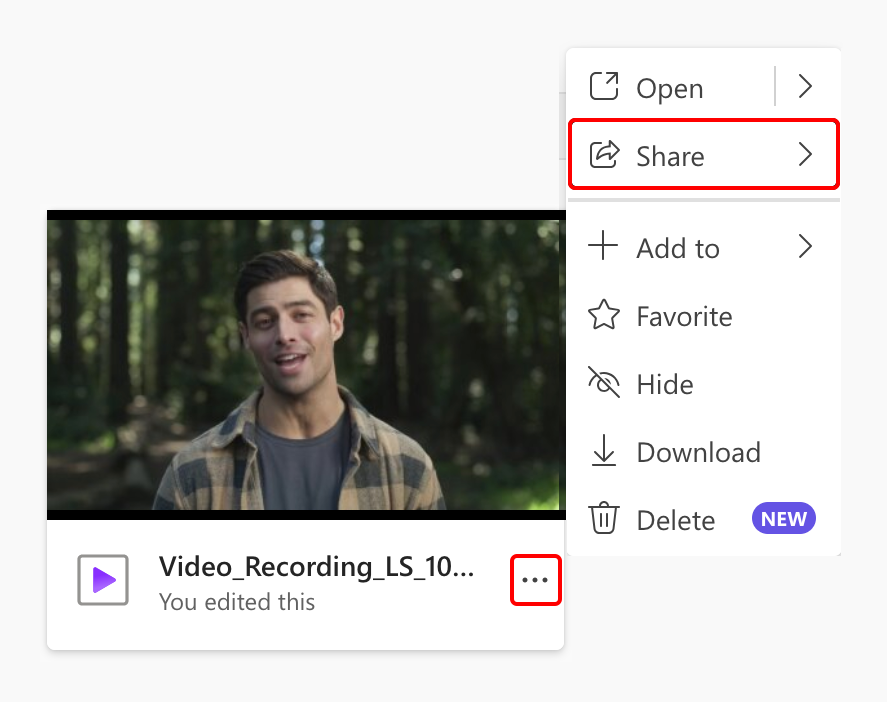
Follow the instructions above in “Sharing Videos (Directly)”
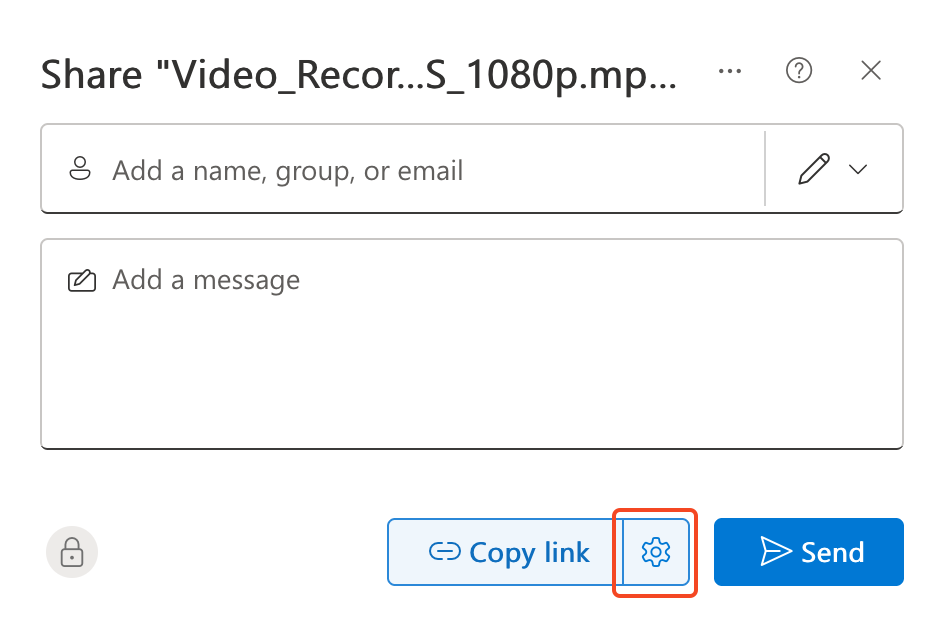
- Choose the Copy Link option
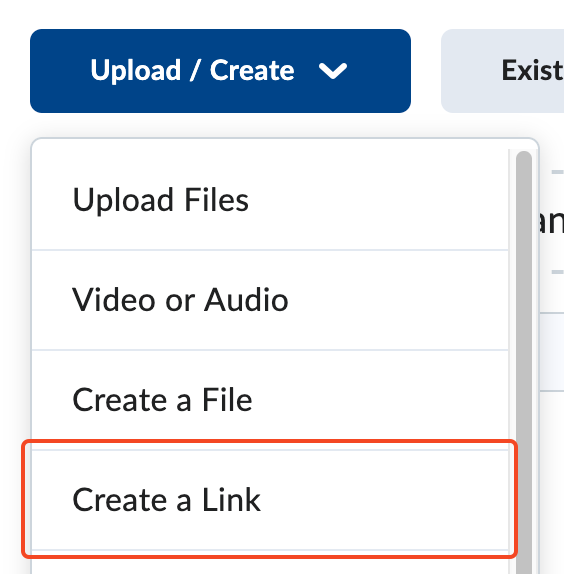
- After copying the link, navigate into Brightspace, the Content area, and module (folder) of your choice
- Click Upload/Create
- Choose Create a Link
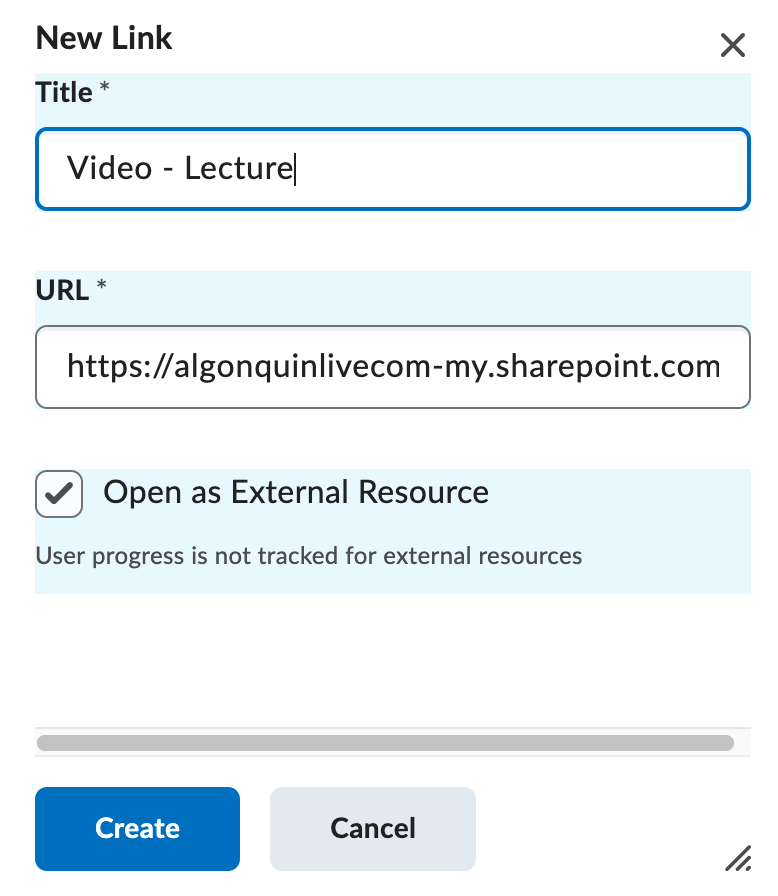
- Type in a title for your video
- Paste the copied link in the URL field
- Choose Open as External Resource (default and recommended)
- Click Create
Note: Only certain browsers will work with this tool (ie. Microsoft Edge, Google Chrome, Safari)
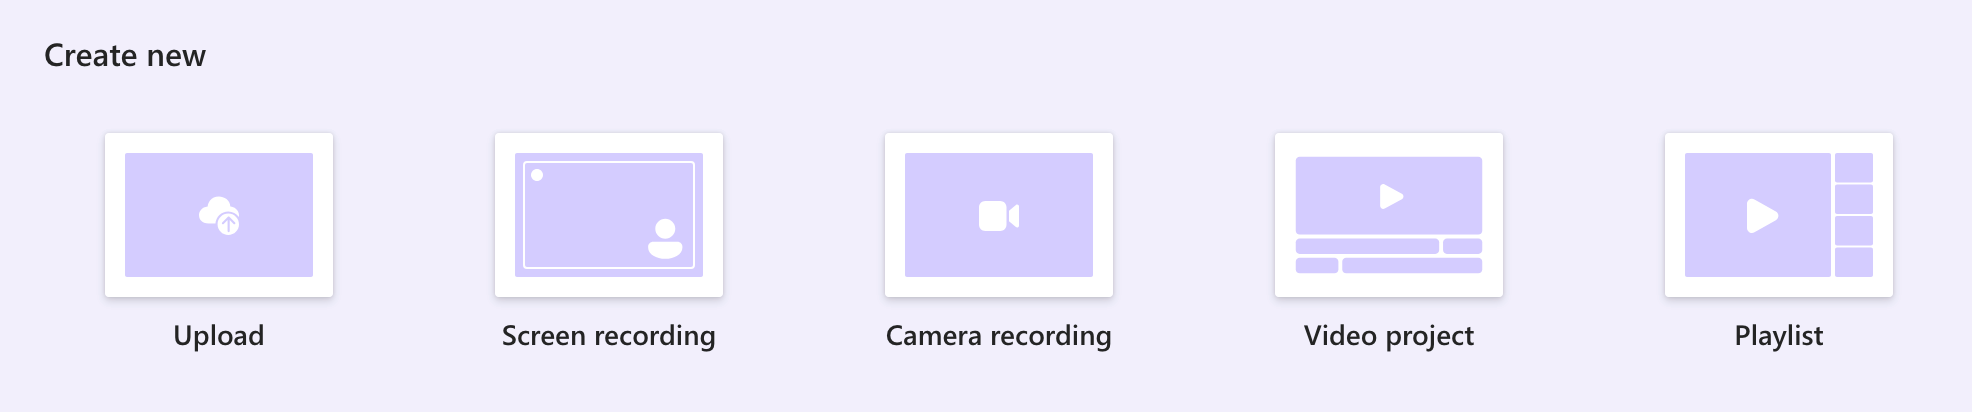
Recording
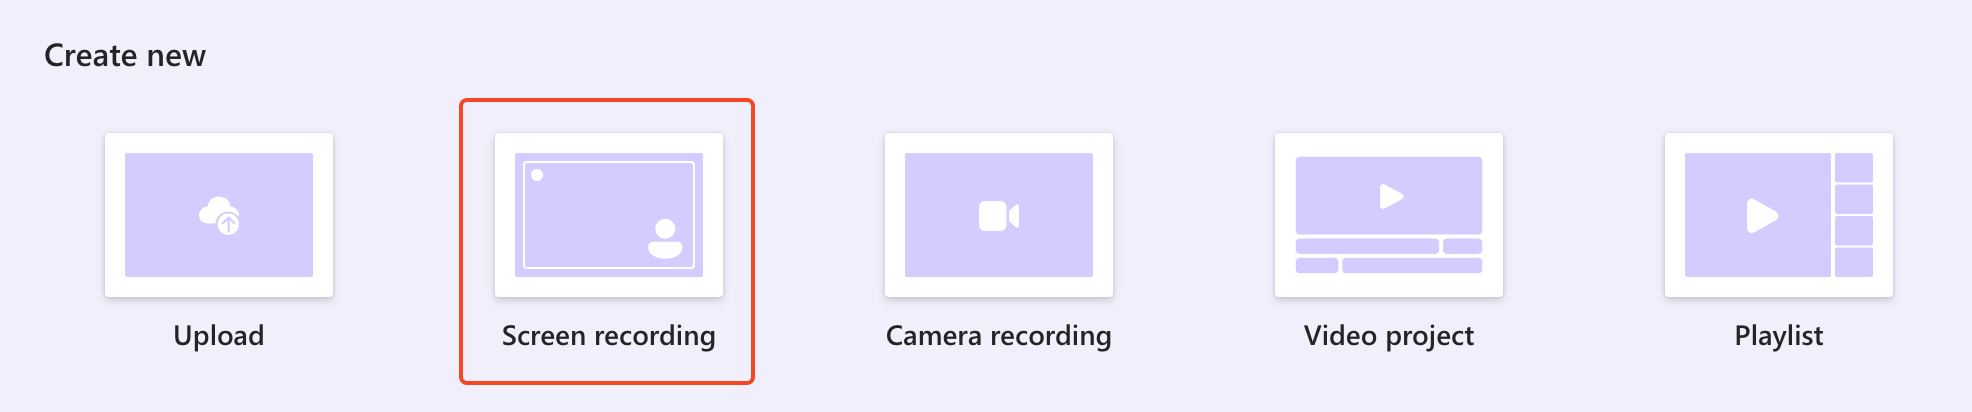
- Go to the Stream start page at https://www.microsoft365.com/launch/stream?auth=2
- Select Screen recording. This will open the camera.
- When prompted by your browser, select Allow to enable your camera and microphone. See this article for more information on how to enable or troubleshoot your camera.
- Select your desired Camera, microphone, and Screen settings.
- Choose any effects you’d like in your video: Text, Backdrop, Stickers, Filter, Frame, Board, and more.
- Select the Start screen recording.
- Select the area that you want to record by choosing either a web browser tab, a window, or the entire screen. Then select Share.
- Recording starts automatically after the count down.
- Select Stop sharing to stop recording. You can also go back to the screen recording page to stop or pause the recording.
Review & upload
- Once the recording is done, you can trim, split, add music, or record more. You can also delete the clip.
- Select the progress bar and drag handles to Trim your recording.
- Select Record more to record more videos.
- Select Music to add background music to your recording.
- When you are done, select Finish to upload the recording to Microsoft 365.
Trimming your Video
Important Note: Trim in Stream doesn’t hard edit your video, instead it hides the parts you trim from your viewers. Anyone with Edit access will be able to see the full video and the trimmed out parts of your video. (Ensure your sharing settings are set to View Only when sharing with students)
To trim your video:
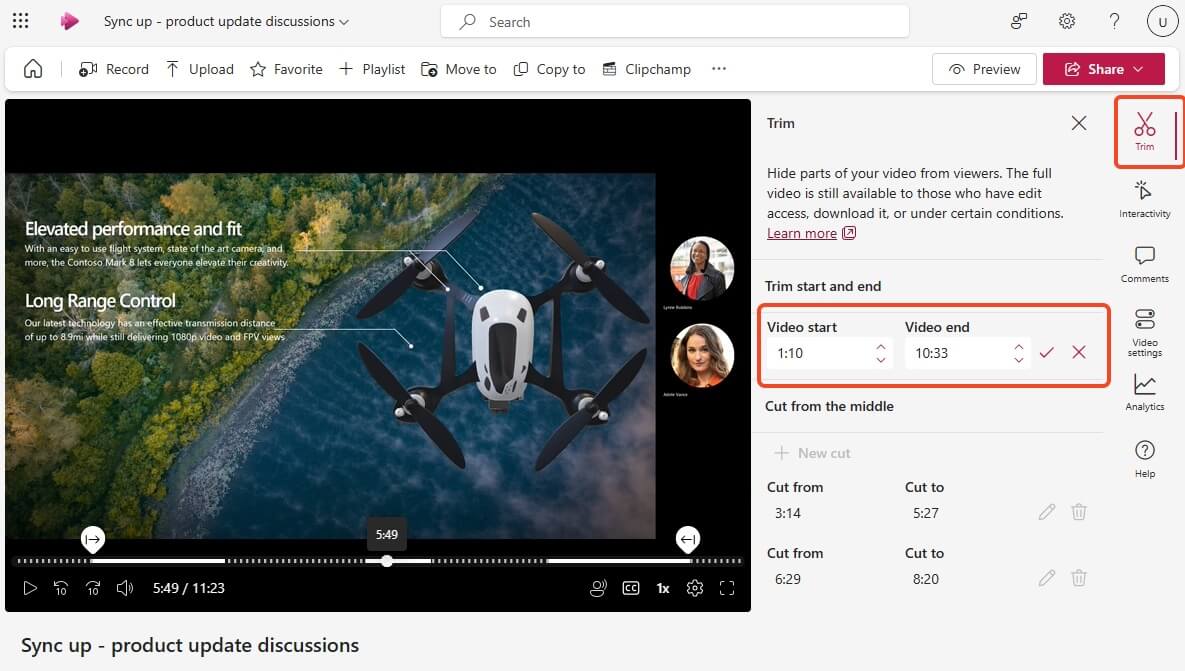
- Navigate to your video Microsoft OneDrive or Stream
- Click on the title/thumbnail of the video to enter the video settings
- On the right side, click Trim to enter the trimming screen
- Use Trim start and end or Cut from the middle to trim out the parts of your video
For more detailed instructions, visit https://support.microsoft.com/en-us/office/how-to-trim-videos-in-microsoft-stream-c41f21f5-e803-4dbf-99a6-65452003a1ee
Editing your Video
Microsoft Stream has adopted a video editing solution called Clipchamp.
Important Note: If you are planning on editing a video – ensure you edit it first before using the other features – such as transcripts/closed captioning, interactivity, etc.
To edit your video with Clipchamp:
- Navigate to your video Microsoft OneDrive or Stream
- Click on the title/thumbnail of the video to enter the video settings
- Click on Clipchamp from the top navigation bar

- Choose Copy Now
This will create a new version of your video and will save as a new file in OneDrive/Stream.
Use this Microsoft Tutorial on editing in Clipchamp: https://support.microsoft.com/en-us/topic/how-to-edit-a-video-in-clipchamp-fedb7b6c-4d31-496b-837f-474bc9aa2367
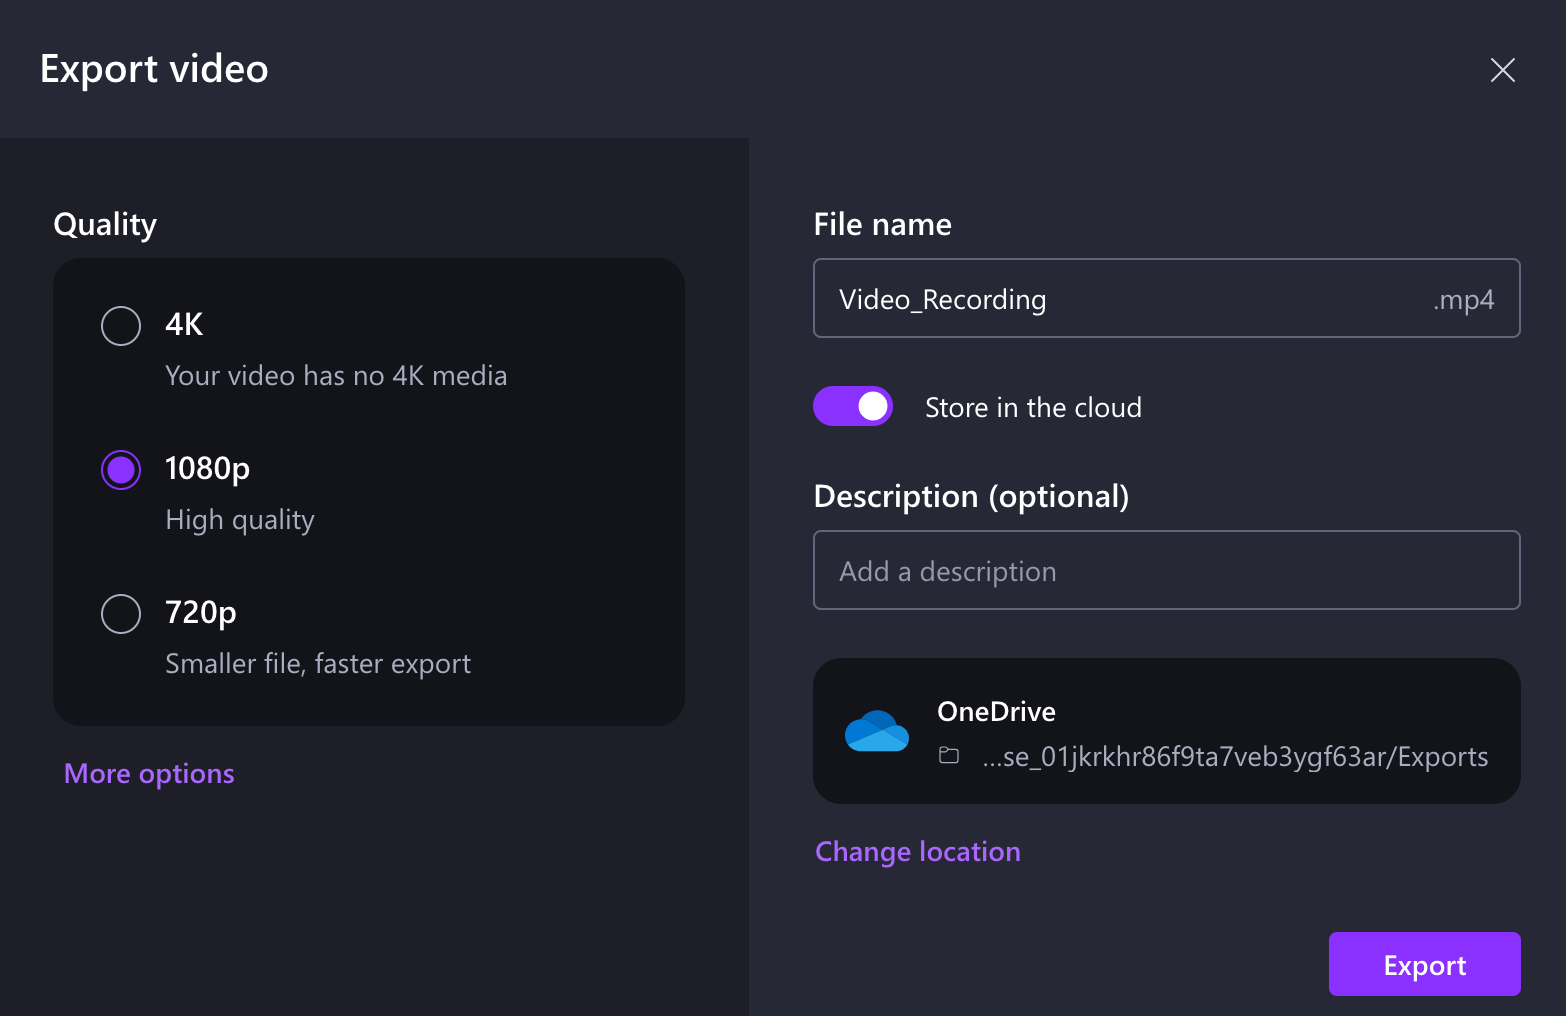
- Once you are finished editing your video, use Export to save this as a new copy to your OneDrive/Stream.
- Name your file
- Select quality (generally 1080p or 720 is a good choice)
- Select Store in Cloud
- Select a location in OneDrive to save it
 Microsoft Stream is a video-sharing tool built into your Algonquin College Microsoft 365 account that makes it easy to record, upload, and share videos with students and colleagues. Whether you’re saving a lecture for students to watch later, sharing a quick tutorial, keeping a meeting recording, or having students submit video assignments to you, Microsoft Stream provides a collection of tools to support this: